How to Avoid Water Leakage Around Windows: 2026 Technical
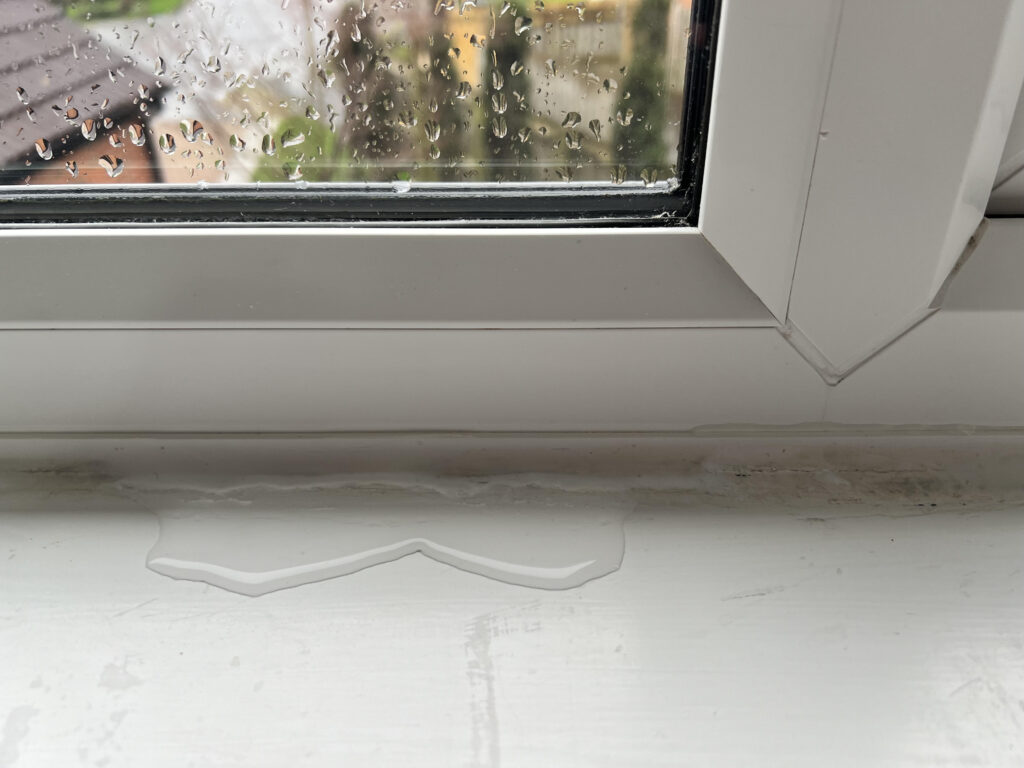
The building envelope serves as a sophisticated defense system, yet its integrity is most frequently compromised at the junctions where transparent glazing meets opaque wall assemblies. Water, driven by hydrostatic pressure and gravity, possesses an almost kinetic intelligence for locating microscopic failures in flashing, sealants, and frame joinery. How to Avoid Water Leakage Around Windows. When moisture penetrates these boundaries, the consequences are rarely confined to a simple puddle on a windowsill; rather, they initiate a slow-motion degradation of the structural substrate, manifesting as hidden fungal growth, compromised insulation, and the eventual rot of wooden framing members.
To address fenestration moisture management with the necessary rigor, one must move beyond the superficial application of caulk. Modern building science treats the window not as a static object, but as a dynamic component of a drainage plane. In this context, water is not merely blocked; it is managed, redirected, and encouraged to exit the wall cavity through engineered pathways. As construction standards in 2026 continue to prioritize airtightness, the stakes for moisture control have risen; a house that cannot “breathe” is a house that cannot easily dry, making the prevention of liquid water ingress the primary directive for any durable structure.
This article serves as a definitive exploration of hydraulic defense in residential and commercial architecture. It transitions from the theoretical physics of surface tension and capillary action to the practical governance of long-term maintenance. By shifting the focus from reactive repairs to systemic prevention, stakeholders can develop a robust framework for preserving the structural health and indoor air quality of their properties.
Understanding “how to avoid water leakage around windows”
The challenge of how to avoid water leakage around windows is frequently misinterpreted as a quest for a “waterproof” seal. In the professional editorial view, a truly waterproof window installation is a statistical improbability over a thirty-year lifecycle. Instead, the goal is “managed resilience.” This requires a multi-perspective understanding that acknowledges the inevitability of seal failure and creates a secondary defense system to mitigate the impact of that failure.
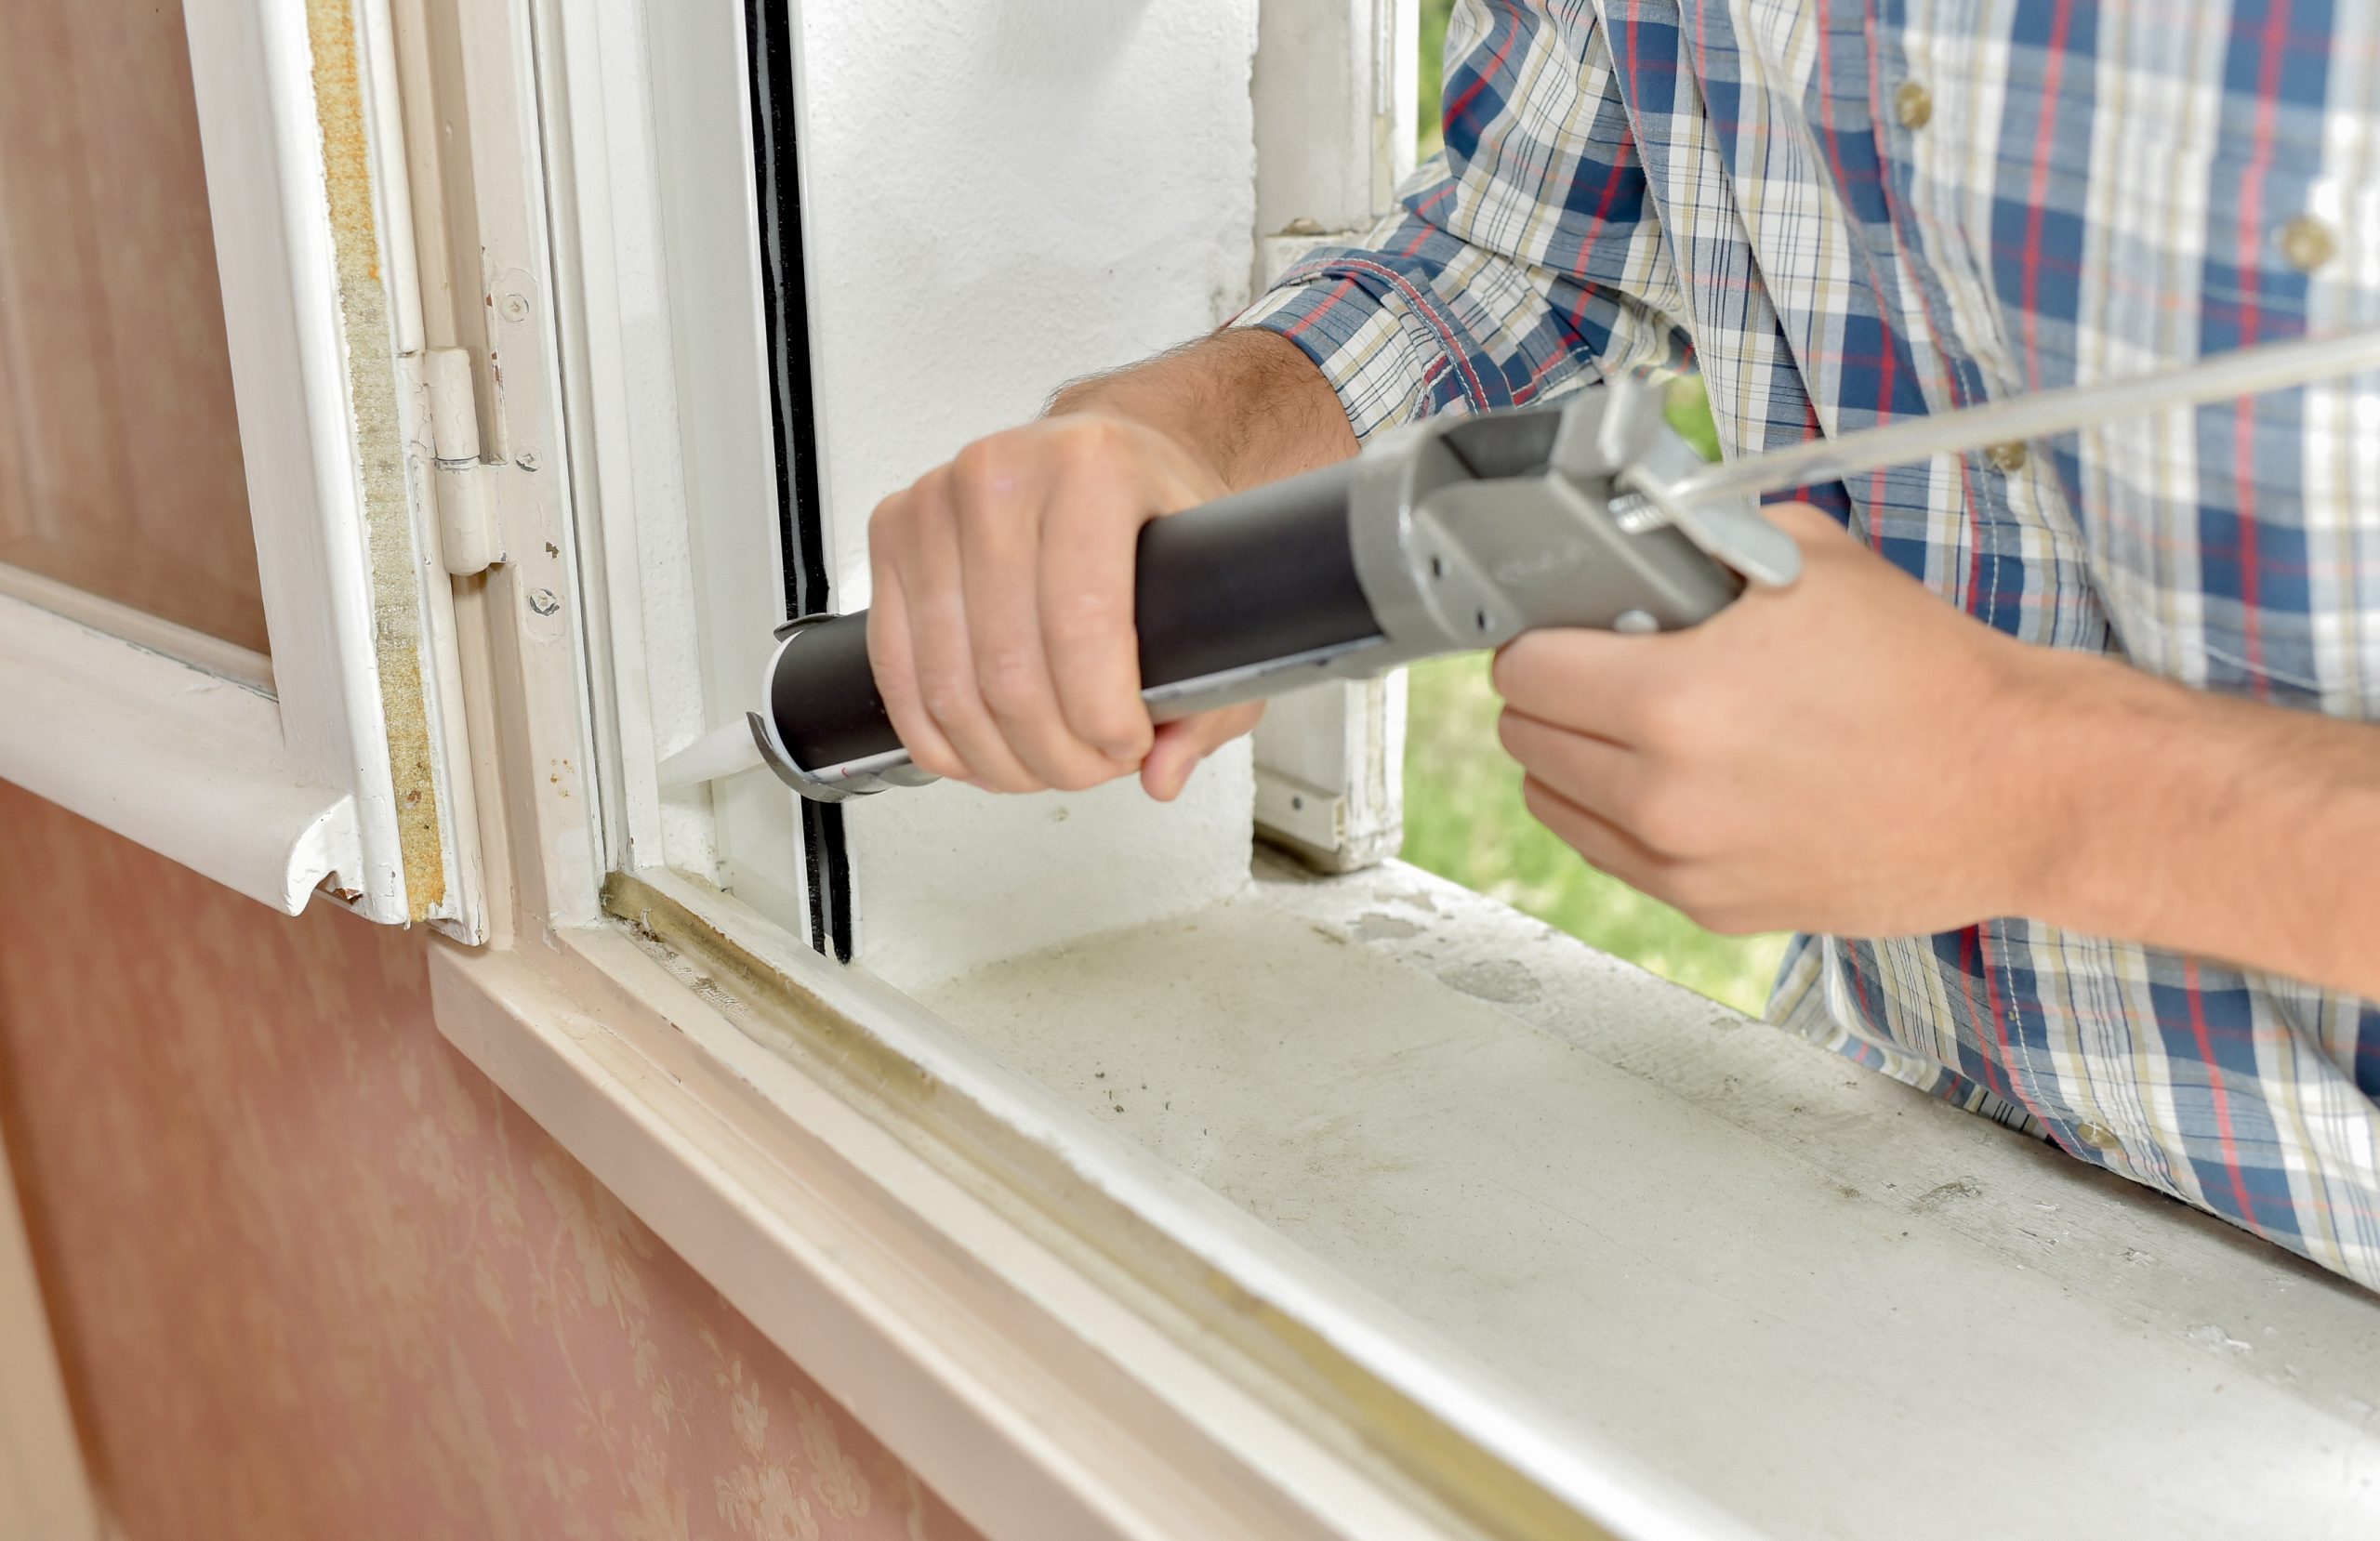
A common oversimplification is the belief that a bead of exterior caulk is the primary line of defense. In reality, caulk is a maintenance item with a finite lifespan, subject to UV degradation and thermal expansion. Relying on it exclusively is a high-risk strategy. A sophisticated approach prioritizes the “water-resistive barrier” (WRB) and the integration of flashing. The flashing should be shingled—lapped in a way that gravity naturally pulls water over the next layer—ensuring that if the primary sealant fails, the water still terminates on the exterior of the siding rather than the interior of the drywall.
Another layer of complexity involves the difference between “bulk water” (rain) and “vapor.” While this discussion focuses on bulk water ingress, the two are inextricably linked. A window assembly that prevents rain from entering but traps interior humidity against cold surfaces will eventually suffer from “leak-like” symptoms through condensation and mold. Therefore, understanding moisture management requires a holistic view of the window’s environment, from the prevailing wind-driven rain patterns of the local climate to the specific permeability of the wall’s sheathing.
Contextual Background: The Evolution of the Drainage Plane
Historically, windows were installed in thick masonry walls where moisture could be absorbed and later evaporated—a “mass wall” approach. As the industry moved toward lighter, wood-framed construction in the 20th century, the walls became thinner and more susceptible to water damage. Early “barrier” systems attempted to seal every gap, but these often failed because they provided no exit strategy for water that inevitably bypassed the outer skin.
The late 1990s and early 2000s saw a paradigm shift toward “rain-screen” and “drainage-plane” technology. This acknowledged that the exterior cladding (siding, brick, or stucco) is not a waterproof layer, but a “water-shedding” layer. The real defense moved inward, to the flashing and the house wrap. In 2026, the evolution has continued with the widespread adoption of liquid-applied flashing membranes and “sill pans”—sloped reservoirs under the window that catch leaks and drain them to the outside. This shift from “blocking” to “draining” is the foundation of modern moisture prevention.
Conceptual Frameworks and Mental Models
1. The Shingle Effect (Lapping Logic)
This is the most fundamental mental model in moisture management. Every layer of a window installation must lap over the one below it. Just as shingles on a roof ensure water cannot flow upward into a seam, window flashing must start at the bottom (sill), followed by the sides (jambs), and finally the top (head). Reversing this order is the most common cause of catastrophic window leaks in new construction.
2. The Capillary Break Framework
Water can move upward against gravity through narrow spaces, a phenomenon known as capillary action. This framework dictates that we must create “breaks”—larger gaps or non-absorbent materials—that prevent water from being sucked into the joints between the window frame and the wall.
3. The Hydrostatic Pressure Model
During wind-driven rain, the air pressure on the outside of a window is higher than the pressure inside. This “sucks” water through even the tiniest cracks. Understanding how to avoid water leakage around windows means recognizing that we aren’t just fighting gravity; we are fighting a pressure differential. This model encourages the use of “pressure-equalized” drainage systems, which use baffled vents to balance the internal and external air pressure.
Key Categories of Prevention Strategies
Moisture management strategies are categorized by their mechanical approach and the stage of the building lifecycle.
| Category | Primary Mechanism | Trade-off | Ideal Context |
| Mechanical Flashing | Formed metal or plastic drips | Rigid; harder to seal corners | High-wind/Exposure areas |
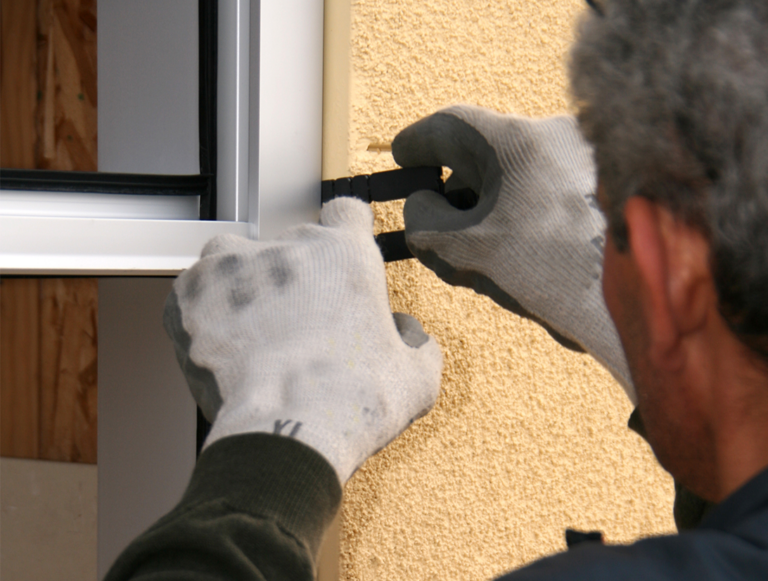
| Self-Adhering Tape | Butyl or Acrylic “Peel-and-Stick” | Installation temp sensitive | Modern wood-frame homes |
| Liquid Membranes | Brush-on/Sausage-gun polymers | Higher material cost | Complex geometries/Commercial |
| Sill Pan Assemblies | Sloped collection reservoir | Requires deeper rough opening | Critical first line of defense |
| Drip Caps | Over-window metal shields | Aesthetic impact | All windows without eaves |
Realistic Decision Logic
The selection of a strategy should be dictated by the “Exposure Factor.” A window tucked under a wide soffit on a single-story house has a low exposure factor and may rely on standard flashing tapes. However, a window on the third floor of a coastal home with no overhangs requires a “High-Performance” strategy: a liquid-applied membrane combined with a rigid stainless-steel sill pan and a dedicated rain-screen gap.
Detailed Real-World Scenarios and Constraints How to Avoid Water Leakage Around Windows
Scenario 1: The Coastal Modernist Box
A home with “flush-mount” windows and no overhangs in a hurricane-prone region.
-
The Problem: Traditional flashing tapes often struggle with the extreme negative pressures and salt-air degradation.
-
The Strategy: Liquid-applied flashing is the only viable option here. It creates a seamless, monolithic “boot” around the rough opening.
-
Failure Mode: If the liquid membrane is applied too thin, it can crack under structural settling, allowing pressurized water to enter at the corners.
Scenario 2: The Retrofit Replacement
Installing a new window into an existing opening where the original house wrap is damaged.
-
The Problem: You cannot easily “lap” the new flashing under the old, hidden house wrap.
-
The Strategy: Use a “Z-flashing” or a specialized retrofit sill pan that can be integrated with the existing siding.
-
Failure Mode: Relying on “caulk-only” to bridge the gap between the new window and the old siding is a five-year solution to a thirty-year problem.
Planning, Economics, and Resource Dynamics
The economics of leak prevention are heavily weighted toward “preventative investment.” The cost of high-end flashing materials is negligible compared to the cost of mold remediation.
Cost Analysis of Prevention vs. Remediation (2026 Estimates)
| Component | Prevention Cost (per window) | Remediation Cost (after leak) |
| Standard Flashing Tape | $15 – $30 | N/A |
| Rigid Sill Pan | $40 – $75 | N/A |
| Liquid Membrane | $80 – $150 | N/A |
| Structural Repair | N/A | $2,500 – $10,000+ |
| Mold Remediation | N/A | $5,000 – $20,000+ |
Opportunity Cost: Choosing a cheaper contractor who skips the sill pan might save $200 per window in labor and materials. However, if that window is on a second floor, the eventual leak may remain undetected for years, rotting the floor joists and compromising the home’s structural equity. The “true” cost of a $500 window installation is often thousands if the hydraulic logic is flawed.
Tools, Strategies, and Support Systems
To effectively execute a plan for how to avoid water leakage around windows, specific technical support systems must be deployed.
-
Backer Rods: Essential for “two-point adhesion.” When caulking, the sealant should only touch the window and the siding—not the back of the gap. The backer rod provides this gap and allows the caulk to stretch like a rubber band.
-
J-Rollers: Used to apply pressure to flashing tapes. Without mechanical rolling, “micro-gaps” remain where water can be wicked behind the adhesive.
-
End-Dams: Small “upturns” at the end of a window sill or drip cap. They prevent water from running off the end of the metal and back into the wall.
-
Baffled Weep Holes: In vinyl or aluminum windows, these allow water that gets into the frame to drain out while preventing wind from pushing rain back in.
-
Stainless Steel Fasteners: In coastal areas, standard galvanized screws will rust through in years, creating “pin-hole” leaks directly into the framing.
-
Compatible Sealants: Not all caulks stick to all flashing tapes. An “ASTM C920” compliant sealant is generally required to ensure the bond doesn’t peel under thermal stress.
Risk Landscape and Compounding Failure Modes
Water leakage is rarely the result of a single catastrophic break; it is the compounding of “micro-failures.”
-
The “Reverse Lap” Risk: This is the ultimate sin of window installation. Lapping a higher layer under a lower layer creates a funnel that directs water directly into the house.
-
Thermal Fatigue: Windows expand and contract daily. If a sealant is too rigid (like many cheap painters’ caulks), it will crack within two seasons, opening a path for moisture.
-
Chemical Incompatibility: Using “acid-cure” silicone on certain metal flashings can cause the metal to corrode, creating leaks where there were none.
-
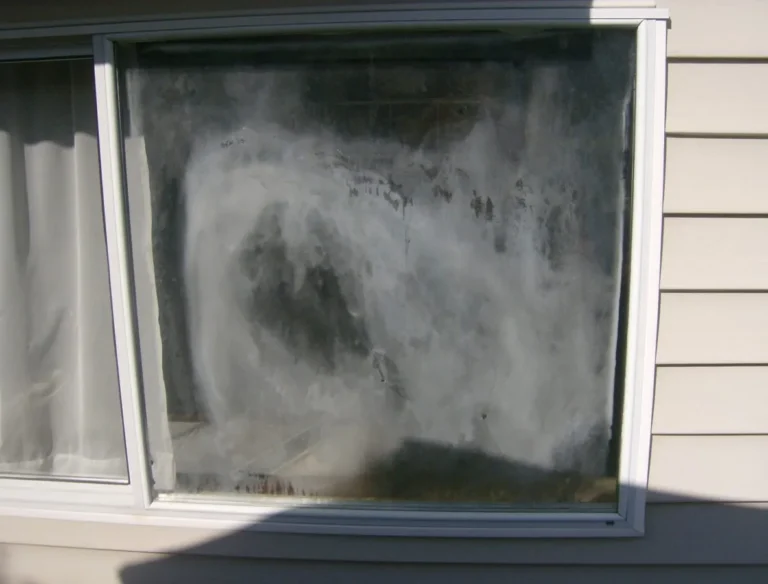
The “Hidden Leak” Syndrome: Modern energy-efficient homes are so well-insulated that a small leak may never dry out. Instead of a visible stain, you get “hidden rot” that isn’t discovered until the window literally begins to sag.
Governance, Maintenance, and Long-Term Adaptation
Moisture management is a “long-cycle” governance task. It requires a review schedule that adapts to the aging of the materials.
-
The Annual Sealant Audit: Once a year, preferably before the rainy season, inspect the perimeter caulk. Look for “voids” or areas where the caulk has pulled away from the substrate.
-
Weep Hole Clearance: Vacuum out the bottom tracks of sliding or hung windows. Dust and debris can clog the weep holes, causing water to back up and overflow into the interior floor.
-
Drip Cap Verification: Ensure the metal shield above the window hasn’t been bent or obstructed by bird nests or debris.
-
Adjustment Triggers: If a window becomes difficult to lock, it may have shifted. A window that doesn’t lock doesn’t compress its gaskets, making it highly susceptible to wind-driven rain leaks.
Measurement, Tracking, and Evaluation
How do we quantify the success of our hydraulic defenses?
-
Leading Indicators (Pre-Leak): Moisture meter readings in the drywall below the window corners after a heavy storm. A reading above 15% indicates a failure in the drainage plane.
-
Quantitative Signals: Using a “spray bar” test (ASTM E1105) during construction to simulate a hurricane-force rain event. This is the only way to “prove” the system works before the siding is installed.
-
Qualitative Signals: The “Dust Test.” If you find streaks of dust on the interior windowsill after a windstorm, air is getting in—and if air can get in, water is likely to follow.
Common Misconceptions and Industry Corrections
-
Myth: “More caulk is always better.”
-
Correction: Excessive caulk can actually trap water inside the wall by blocking drainage paths. Caulk should be a “seal,” not a “filler.”
-
-
Myth: “Vinyl windows don’t leak.”
-
Correction: While vinyl doesn’t rot, the joints where the vinyl pieces are welded can crack over time, allowing water into the hollow chambers of the frame.
-
-
Myth: “A new window will fix my existing leak.”
-
Correction: If the leak is coming from the roof or the siding above the window (a “flanking leak”), a new window will do nothing to solve the problem.
-
-
Myth: “Storm windows are for insulation only.”
-
Correction: A well-fitted storm window is a primary shield that takes the brunt of the water load, significantly extending the life of the primary window’s seals.
-
Conclusion: Synthesizing Hydraulic Resilience
The methodology of how to avoid water leakage around windows is a testament to the adage that “the best defense is a good offense.” By building with the assumption that the outer seal will eventually fail, we create structures that are inherently resilient. This involves a commitment to the “unseen” details—the sill pans, the shingled laps, and the capillary breaks—that do the heavy lifting when the weather turns volatile.
Ultimately, preventing window leaks is an exercise in intellectual honesty. It requires acknowledging the limits of our materials and the persistence of the natural environment. A house that remains dry for fifty years is not an accident; it is the result of a disciplined architectural “governance” that treats moisture management as a non-negotiable pillar of construction. As we look toward a future of more intense weather patterns, these principles will move from “best practices” to “essential survival strategies” for the modern building.